
Mobic (Meloxicam) Interactions: What to Avoid While Taking It
Read More

Medically reviewed by Lauren Okafor | MD , The Frank H Netter MD School of Medicine, Loyola University Medical Center on April 14th, 2026. Published on April 9th, 2026. Updated on July 23rd, 2026.
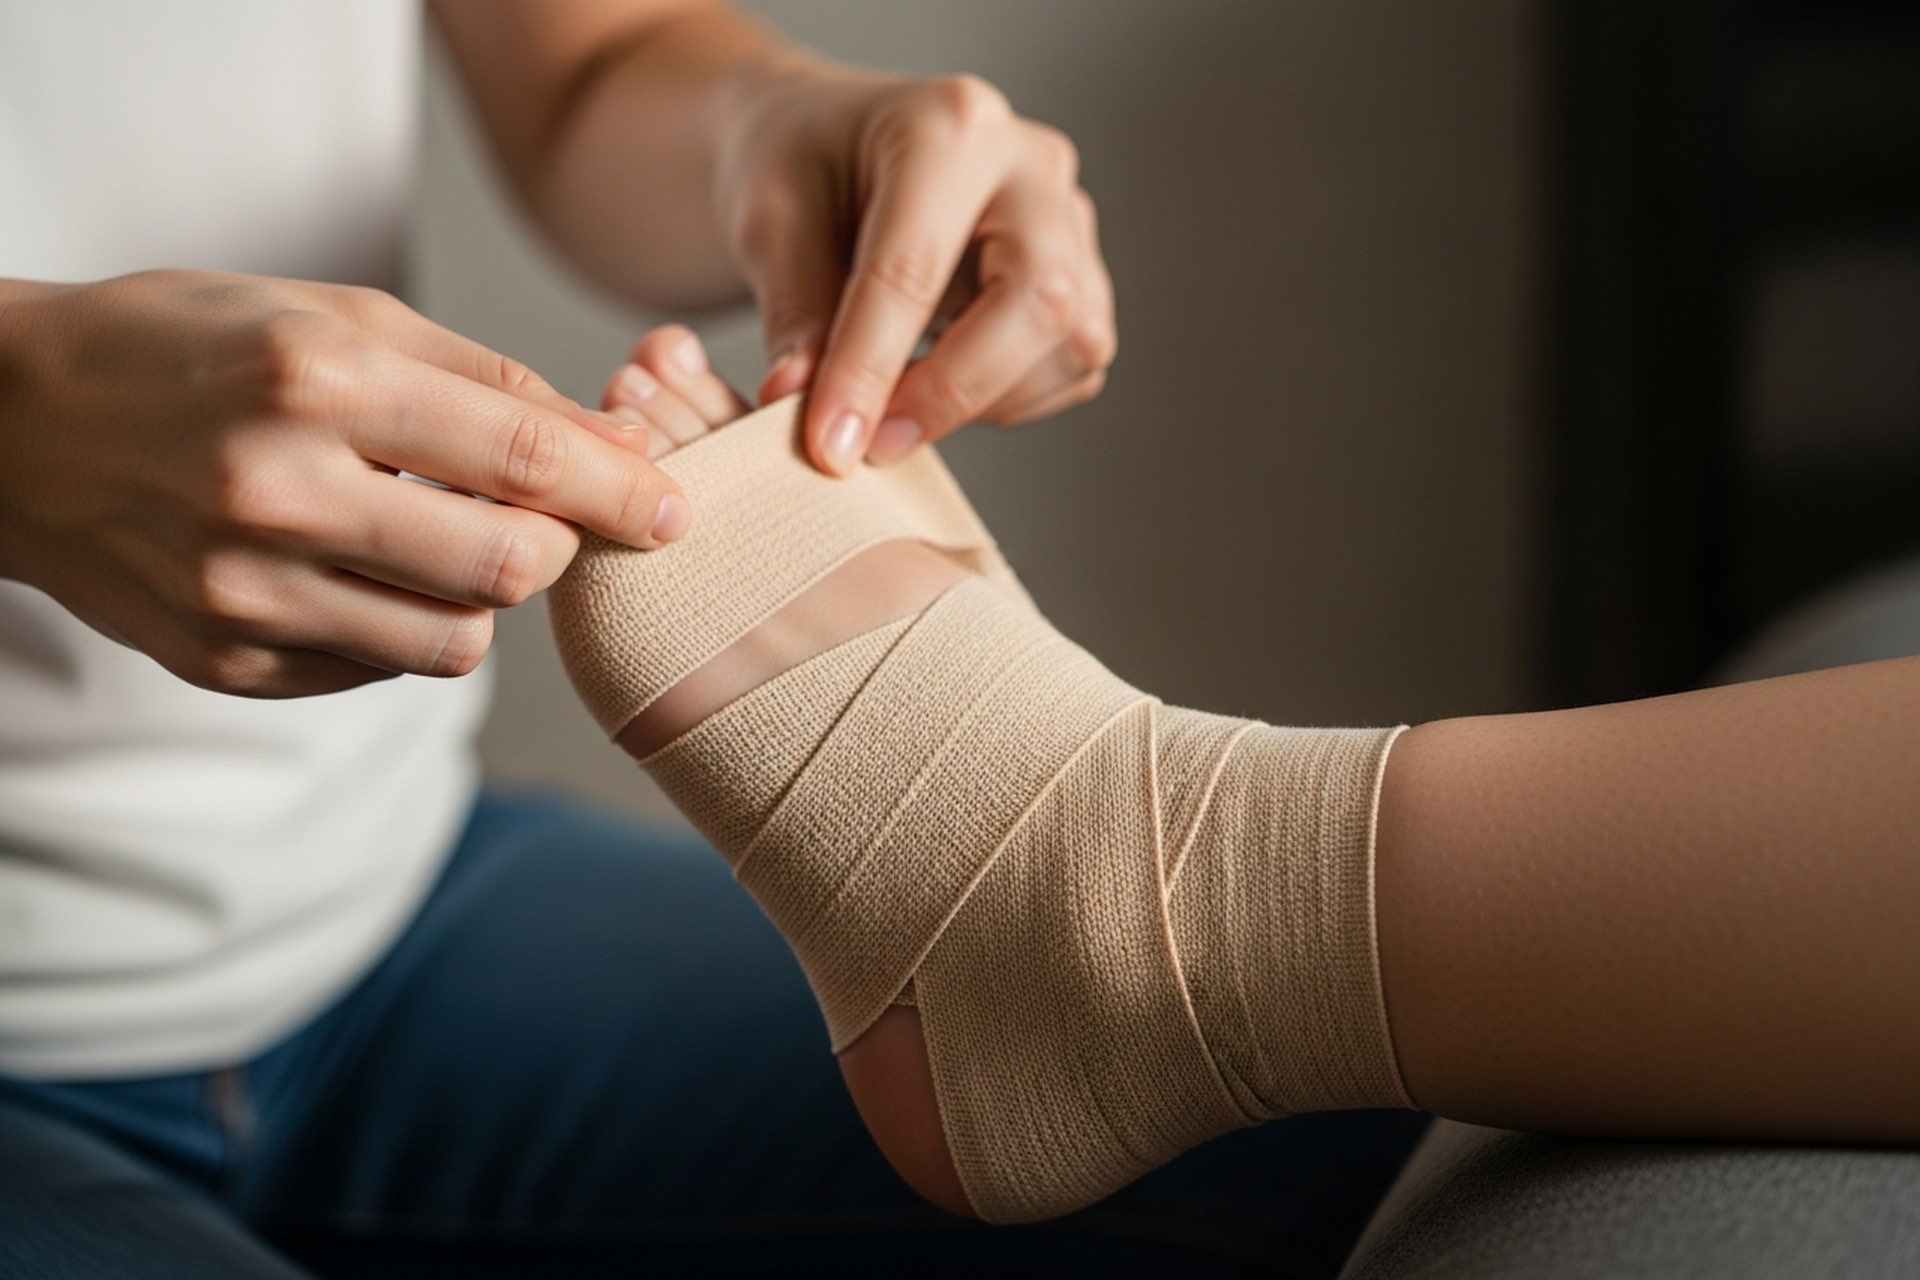
Compression with an elastic bandage reduces swelling by limiting how much fluid accumulates in the soft tissue, which is one of the most effective things you can do in the first 24 to 72 hours after a sprain.
A 3-inch or 4-inch wide elastic bandage works best for the ankle; narrower bandages create pressure points, and wider ones are difficult to apply correctly.
The figure-8 wrapping method provides the most secure hold by anchoring the arch, crossing over the top of the foot, looping around the ankle, and repeating the pattern.
The bandage is too tight if your toes turn pale, feel numb, or tingle; rewrap immediately with less tension if this happens.
Remove the wrap at night to allow skin to breathe and circulation to normalize, and rewrap in the morning before you get up.
If your symptoms are severe or you are unsure whether your sprain needs urgent care, Doctronic.ai connects you with a licensed provider by telehealth for rapid guidance.
When you sprain your ankle, ligament fibers tear, and the body responds with inflammation. Blood vessels become more permeable, and fluid rushes into the surrounding tissue, increasing pain and limiting movement.
Compression works by physically resisting this fluid accumulation. An elastic bandage creates circumferential pressure that limits how much the tissue can swell outward. Less swelling means less pain, earlier movement, and a more efficient recovery environment. It also provides mild mechanical support, reducing the micromotion at the injury site that causes repeated irritation.
Compression is most effective when applied within the first hour. The sooner fluid accumulation is slowed, the less swelling builds up, and the less work the body has to do to clear it later.
A 3-inch wide bandage works well for most adults and allows clean overlap through the figure-8 pattern without gaps or bunching. A 4-inch bandage suits larger ankles or those who want slightly more lower-leg coverage. Bandages narrower than 3 inches create uneven pressure and can produce pressure ridges at the edges.
Look for a self-adherent bandage (sometimes called a cohesive bandage) that holds without clips, which makes re-wrapping easier throughout the day. Standard elastic bandages with metal clips also work fine; just secure the clips flat against the wrap so they do not press into skin.
Sit in a chair or on the edge of a bed with your foot resting flat and your ankle in a neutral position (roughly 90 degrees to the leg). Wrapping while your ankle is pointed or flexed produces a poor fit when it returns to neutral.
Starting at the ball of the foot, just behind the toes, wrap the bandage around the foot twice. These anchor rounds should be snug but not tight; keep the bandage flat and avoid folds, which become pressure ridges against the skin.
Angle the bandage diagonally across the arch toward the inner (medial) side of the foot, then loop it under the heel and up the outer (lateral) side of the ankle. The arch is the narrowest part of the foot; maintain even tension without pulling tight.
Bring the bandage diagonally across the top of the foot from the outer ankle toward the inner ankle, forming the first crossing of the figure-8. Overlap each pass by about half the bandage width so there are no gaps in coverage.
Continue the bandage around the back of the ankle and across the front of the lower leg, slightly above the ankle joint. This loop anchors the crossing pass to the ankle and gives the figure-8 its mechanical stability. Keep it even around the Achilles tendon and do not let it slip down onto the heel bone.
Angle back down diagonally, repeat the foot crossing, and loop around the ankle again. Two to three complete figure-8 passes provide thorough coverage. End a few inches above the ankle bone with two straight rounds to lock the wrap in place, then secure with clips or press the self-adherent end flat against itself. Position the secured end on the outer side of the leg away from any bony prominences.
The wrap should feel like firm, even pressure, similar to a well-fitted compression stocking.
Check toes immediately after wrapping and again after 10 to 15 minutes of activity. Signs the wrap is too tight:
Toes that appear pale, white, or bluish
Numbness or tingling anywhere in the foot
A sensation that the foot is falling asleep
Pain that increases after wrapping
A visible ridge where a bandage edge cuts into the skin
If any of these occur, unwrap and rewrap with less tension. Toes may feel slightly warmer than usual as compression redirects flow; that is normal. What you are watching for is loss of color or sensation.
Remove the wrap at night before sleep. Wearing it while lying down restricts the circulation your body relies on for overnight tissue repair, with little compression benefit since the ankle is at heart level.
The bandage also needs to come off before showering. Wet elastic bandages lose their compression properties and dry slowly, creating conditions for skin irritation and maceration (skin breakdown from prolonged moisture).
Rewrap each morning before you stand up. When the ankle hangs in a dependent position, gravity promotes swelling; having compression in place before you get up limits this effect. Self-adherent bandages can be reused several times before they lose their hold.
Compression is most important during the first 48 to 72 hours when active swelling is occurring. Wrap consistently during waking hours in this window and remove at night.
After 72 hours, you can reduce wrapping to periods of extended standing or activity. Most grade 1 sprains no longer need daily compression by the end of the first week. Grade 2 sprains with significant swelling and bruising benefit from continued wrapping for 5 to 10 days, paired with an ankle brace that provides the lateral stability a bandage alone cannot replicate. Proper ankle sprain aftercare pairs compression with ice, elevation, and gradual mobilization at each recovery stage.
Wrapping in the wrong direction causes the wrap to loosen with every step. Start at the toes and work up toward the leg, not from the calf down. Walking pushes fluid upward; wrapping toe-to-leg works with that direction.
Starting too high is a frequent error. If you begin at the ankle, there is nothing anchoring the arch, and the bandage migrates and bunches with movement. Always anchor at the ball of the foot first.
Skipping the figure-8 and spiraling straight up produces a wrap that sits loosely around the ankle bone prominences with little mechanical stability. The diagonal crossing is what holds the wrap in position.
Wrapping too loosely because you fear tightness leaves the bandage functionally useless. If you see visible slack or ripples across the top of the foot, rewrap with more tension.
Elastic bandages lose tension after repeated use or washing. If the bandage no longer springs back when stretched, replace it.
A compression wrap is appropriate for mild to moderate sprains where you can bear weight, swelling is manageable, and there is no instability. It is not sufficient in several situations.
If the ankle feels unstable or buckles when you walk, a lace-up or stirrup brace provides the lateral support an elastic bandage cannot. If swelling is severe, you cannot bear weight at all, or bruising extends up toward the calf or across the top of the foot, these are signs of a more serious sprain or a possible fracture. An elastic bandage does not change these injuries and can mask symptoms that need imaging.
Grade 3 sprains (complete ligament rupture) and fractures require a walking boot or cast for immobilization. If you are unsure what level of support your ankle needs, a professional evaluation clarifies the injury grade and rules out a fracture so you can manage it correctly from the start.
Two to three complete figure-8 passes provide thorough coverage for most ankle sprains. Each pass should overlap the previous one by about half the bandage width. The wrap should extend from the ball of the foot to a few inches above the ankle bone.
No. When wrapping a sprained ankle, the toes should not be covered. Keeping them exposed allows you to monitor circulation by checking color, warmth, and sensation.
The wrap should begin at the ball of the foot, just behind the toes. From there, it progresses around the midfoot and ankle in a supportive pattern, typically using figure-eight or heel-lock techniques to stabilize the joint.
After wrapping, reassess the toes. They should remain warm, pink, and responsive to touch. If you notice numbness, tingling, increased pain, or color changes, the wrap may be too tight and should be adjusted.
It is generally better to remove the wrap at night. Sleeping with compression on reduces the circulation needed for overnight tissue repair, and lying flat with the ankle at heart level makes compression less necessary. Rewrap in the morning before standing.
Check your toes for pale or bluish color, numbness, tingling, or a sensation of the foot falling asleep. If you notice any of these signs, remove the bandage immediately and rewrap with less tension.
For most grade 1 sprains, wrapping during waking hours for 48 to 72 hours is sufficient. Grade 2 sprains may benefit from continued wrapping for 5 to 10 days. Taper off as swelling resolves and shift to an ankle brace if you need ongoing stability support.
Not entirely. An elastic bandage provides compression and mild support, but cannot provide the lateral stability of a semi-rigid or lace-up brace. For sprains with any instability, a brace is the more appropriate support.
Wrapping a sprained ankle correctly with an elastic bandage reduces swelling, controls pain, and creates the mechanical conditions the ligament needs to repair efficiently. The figure-8 method anchors the arch, stabilizes the ankle, and keeps the bandage from migrating during use. Choose a 3-inch or 4-inch bandage, check toes regularly for circulation, remove at night, and rewrap each morning before standing.
Knowing the basics of first aid for sprains helps you manage ice timing, elevation, and compression systematically from the first hour.
If swelling is severe, you cannot bear weight, or the ankle feels unstable, a wrap is not sufficient on its own. A provider can assess the injury grade and determine whether you need a brace, boot, or imaging. Doctronic.ai connects you with a licensed clinician by telehealth for rapid guidance without leaving home.

Join 50,000+ readers using Doctronic to understand symptoms, medications,
and next steps.
Add your phone number below to get health updates and exclusive VIP offers.
By providing your phone number, you agree to receive SMS updates from Company. Message and data rates may apply. Reply “STOP” to opt-out anytime. Read our Privacy Policy and Terms of Service for more details.
Save your consults. Talk with licensed doctors and manage your health history.